Wednesday, June 25, 2014

More Seven Years War / FIW British foot

Finished up some 28mm British foot soldiers from Conquest Miniatures last night, and took some pictures this evening before the light failed:

Fig. 1 British Grenadiers and 'hatmen' of the SYW/FIW

Fig. 2 The Conquest figures have a lot of detail and animation, and were fun to paint. Instead of the usual "march attack" pose typical of horse and musket figures, these fellows seem to be marching up a dusty road, sweating under the load of knapsacks, haversacks, muskets, cartridges, canteens, and all manner of baggage.

Fig. 3 The hatmen are more lightly-burdened... did they leave their haversacks in camp?

Fig. 4 On the fronts of the mitre caps are a green GR ("George Rex") of the 40th regiment of foot and the white horse of Hanover. Monogrammed hats... sort of like having a big "Dolce and Gabbana" logo...
Fig. 4 On the fronts of the mitre caps are a green GR ("Georgis Rex") of the 40th regiment of foot and the white horse of Hanover. Monogrammed hats... sort of like having a big "Dolce and Gabbana" logo...

Fig.5 "Present!"
Fig.5 "Present!"

Fig. 6: 3mm plywood bases from Litko, flocking and all paint used from the Toy Soldier.

Fig. 7 Conquest makes two poses, the "road marchers" and the "firers." They can rank up together, but it would look better if the rear rank was standing still, or loading or something.

Fig. 8 Hatmen. The Conquest figures are sculpted in four variations per pose, which give a nice sense of individuality.

Fig. 9 The third from the left looks a bit nervous.

Fig. 10 Almost like Beaker. "What was I thinking? I could get killed here."
Fig. 10 Almost like Beaker. "What was I thinking taking those 40 shillings? I could get killed here."

Fig. 11

Saturday, June 21, 2014

Seven Years War British and French

Below are some mostly-finished British and French stands from the Seven Years War and/or French and Indian War (28mm Crusader miniatures from Age of Glory):
Fig.1 Two partial battalions. Eventually I'd like to finish each unit out to five stands/20 figures.

Fig.2 Serrez les Rangs! 1750s-era French infantry. Meant to represent Compagnies franches de la Marine of New France, with greyish-white coats and natural leather load-bearing equipment. Uniform references from the invaluable Kronoscaf site.

Fig.3 "Shoulder your firelocks!" These muskets weigh about eleven pounds each...

Fig.4 Yellow was one of the most popular facing colors for British regiments, along with buff and green. These look like McDonald's corporate brand standards. These figures could stand in for Amherst's 15th regiment in North America, or several other units in Europe or America.

Fig.5 White was the default color for linen gaiters, but various dark shades - black, brown, grey - were used while on marching on campaign. Common soldiers did not actually wear boots, but rather low-cut black buckled shoes.

Fig.6 The person on the left is a sergeant wearing a sash and carrying a spontoon or "half-pike", a vestigial pole-arm weapon which could be used to level the barrels of his soldier's muskets, or, as below, to prevent them from scurrying to safety. The soldier closest carries a hair-covered knapsack, somewhat like a modern bike messenger bag.

Fig.6a Detail from a painting of the battle of Fontenoy in 1745, showing a sergeant using his spontoon to press against the backs of his anxious soldiers.


Fig.7 The Crusader miniature sculpts have a nice, chunky, "toy soldier" feel to them, an are relatively easy to paint.

Fig.8 "Portez vos armes!"

Fig.9 Units stationed in North America soon learned to discard their "hanger" swords for tomahawks. These guys still have theirs.

Fig.10 These bases still need to be flocked with vegetation.

Saturday, May 24, 2014

Gorgon Etruscan Hoplites Part 1

I have been painting a series of Gorgon Studios Etruscans figures. These are meant to represent the Etruscan league's army of about 500BC, in the time of Lars Porsena and early Rome. Most of the army would be equipped in the local Italian style of armor, but the wealthiest Etruscans would purchase costly Greek-style equipment - sort of like buying an expensive foreign car?

These hoplite figures, however, could also stand in for any Greek-pattern infantry of this period - Italiots, Siciliots, etc. 
Fig. 1 Hoplite with Corinthian helmet and spolas armor.
Shield design is a transfer from Little Big Man Studios (click to enlarge).
I remember first reading about "linothorax" armor in the late Peter Connolley's Greece and Rome at War. 
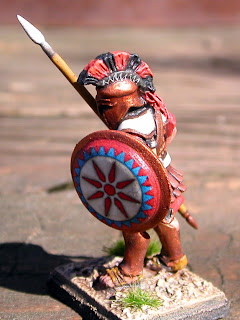
A linothorax is supposed to be a sort of flak jacket composed of many layers of linen cloth glued together into a stiff corslet. The corslet could be left plain, or else additional armor, such as bronze scales, could be sewn to the midsection. There are certainly Greek vase paintings showing soldiers donning armor made of some stiff material, such that the shoulder pieces stuck straight up until they were tied down:
Fig. 2 Kind of like cardboard.

There is now a controversy about this theory - a few yards of linen cloth and some Elmer's glue is inexpensive to us in the machine age, but not 2500 years ago. Why bother growing acres of flax, weaving linen cloth, and gluing up layers of the cloth with water-soluble animal glue, when one could use thick leather instead? The "linothorax" may have actually been made of stiff leather that would not delaminate the first time you got caught out in the rain. Who knows.

Fig. 3 Some helmet crest holders had a zig-zag pattern at the base of the horsehair crest, which is much easier to paint than the checkerboard pattern that was also used.
The fibers of the horse hair crest are bound into a "crest box". The crest box may have simply been glued to the top of the bronze helmet with pine tar.

Although many people imagine Greek-style spear men displaying the uniform "lambda" shield designs of late Spartans, most Greek shield designs were a riot of heraldic variety. Even the Spartans did not use the "everyone shows a lambda" shtick at the time of Thermopylae. Sorry Frank Miller.

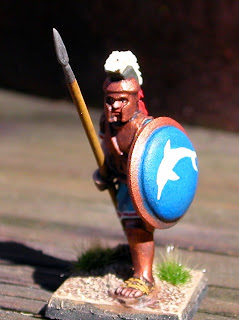
Fig. 4 A very simple hand-painted dolphin.

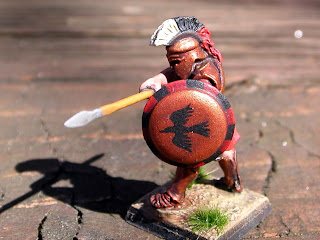
Fig. 5 Simple painted bird and shield rim pattern.

Fig. 6 Beginnings of a phalanx.


Fig. 7 I'm happy with how dolphin guy's tunic stripes came out.
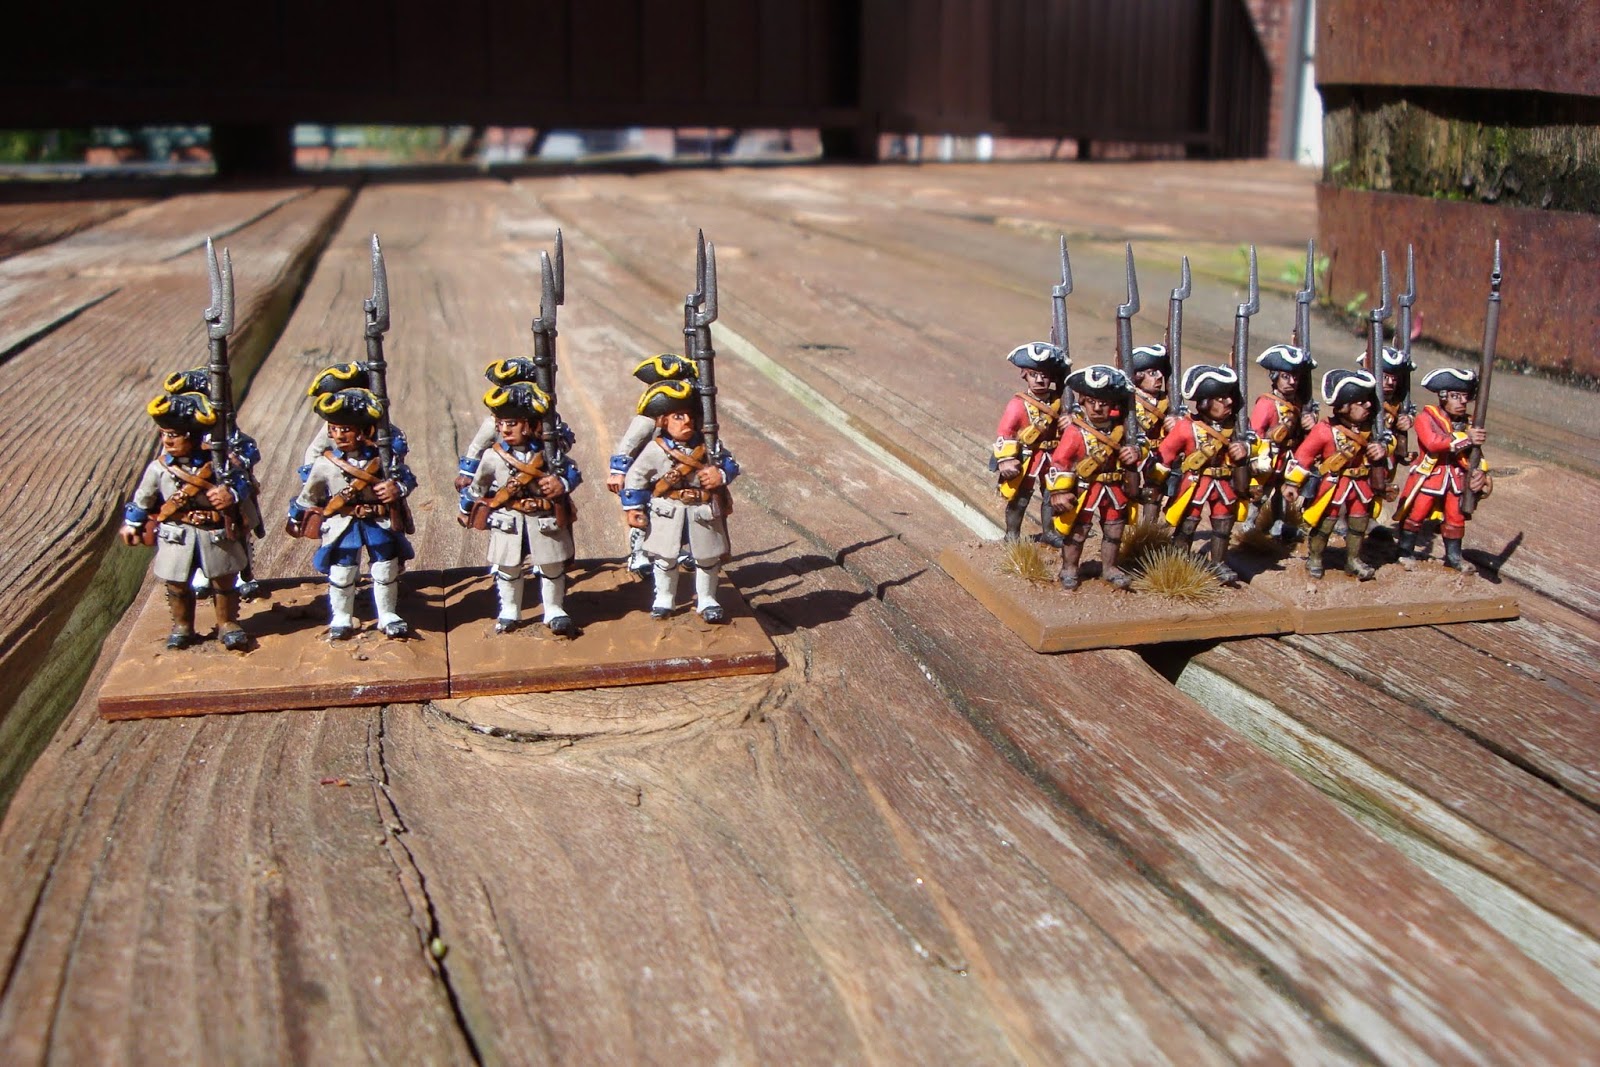
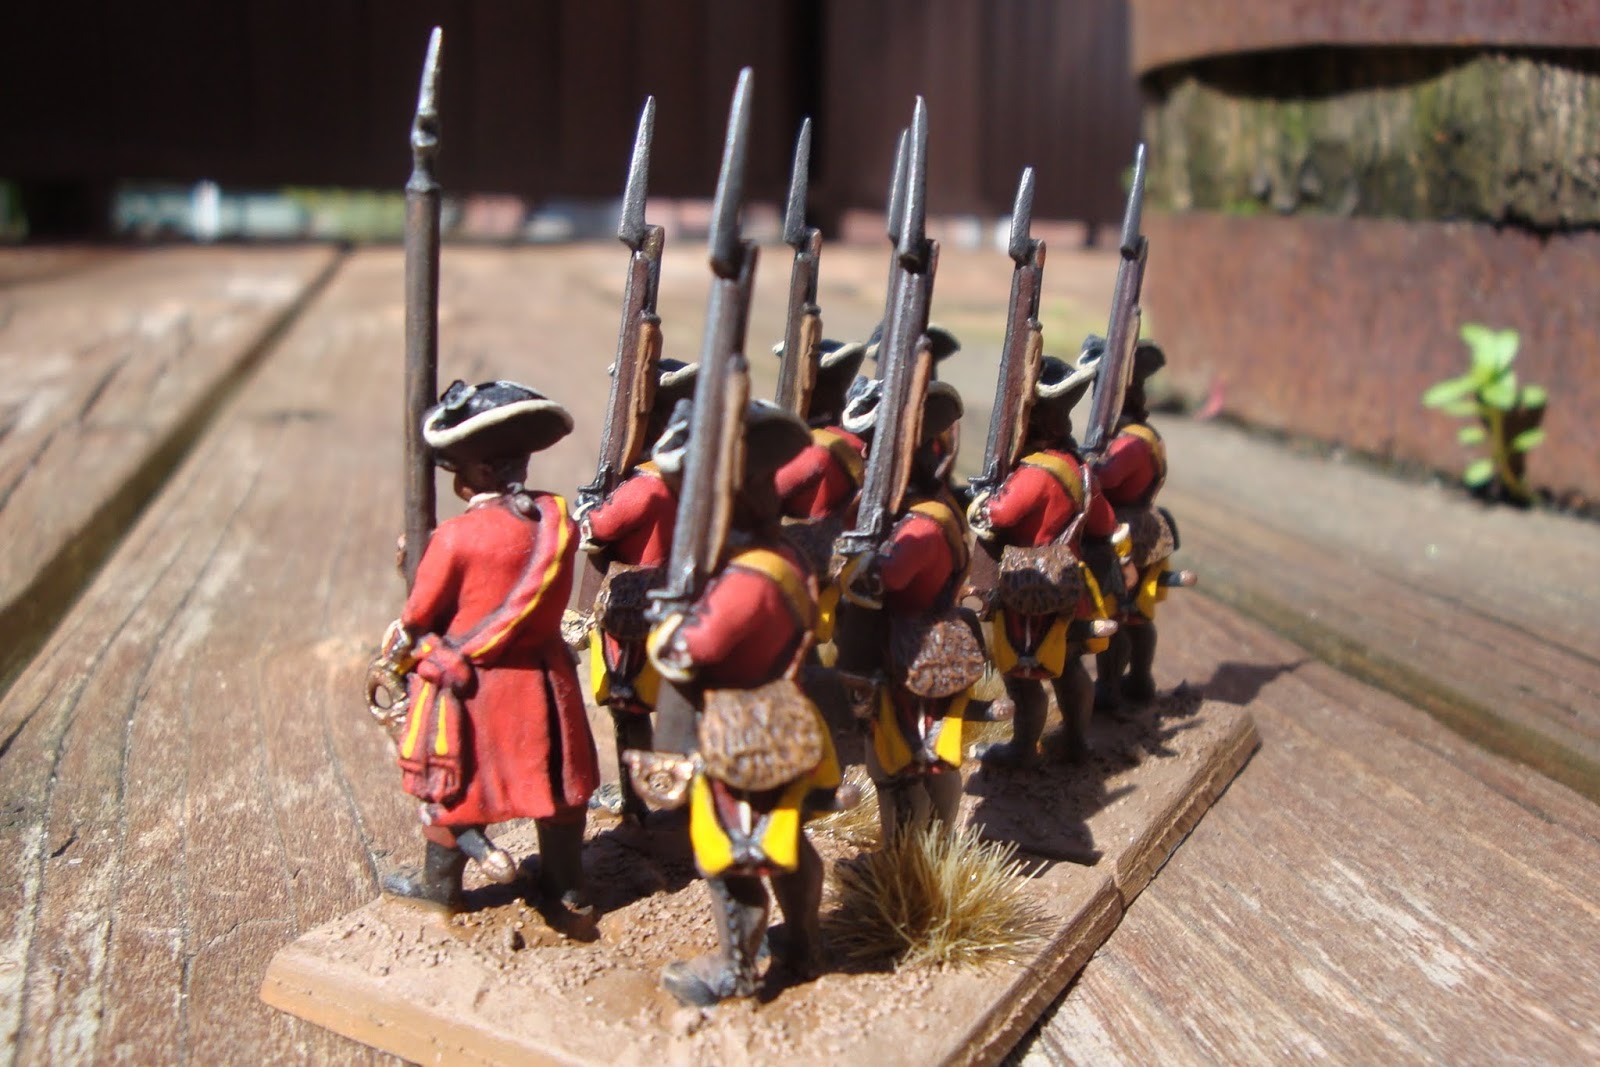
Tiny Spears, Part 2

More examples of handmade spears made from 3/64" brass rod:

Fig. 1 Brass spear glued into place on an unprimed hoplite. This is a Gorgon Studios Etruscan hoplite (click to enlarge).

Fig. 2 These spears are about 1 3/4"(45mm) long. In 28mm scale (1:56), this translates into just over eight feet (2.5 meters).

Fig. 3 Burnished spear blade; a groove separates the spear head from the "wooden" shaft. This allows some dark wash to seep into the groove and distinguish the steel from the wood.

Fig. 3 This is meant to represent the spear's bronze butt spike. Actual spikes appear to have been thinner, longer, and had three or four sides, but this works for me.
Fig. 4 Painted spear in the hand of another hoplite figure from Gorgon.

Tiny Spears, Part 1

I've been painting a number of 25/28mm miniatures that require spears. Although very decent spears can be bought pre-made from companies such as North Star, I have instead been making spears mysef from brass rod.

Fig. 1 Start with 3/64" brass rod (1.19mm). Snip to taste with wire cutters (click to enlarge).
Fig. 2 A couple of examples of different length. 3/64" makes a good-sized haft for a 28mm figure. 1/32" rod (0.8mm) is suitable for a lighter weapon shaft such as a javelin.
Fig. 3 To give the spears a flat blade, I lay each rod on a hard surface and give the end a couple of strikes with a hammer. The regular claw hammer shown works well enough, but a smaller jeweler's hammer would be nice to have.
Fig. 4 A closer look at the flattened ends. This is called "planishing". Sometimes I'll snip the ends into a "^" point to speed up the filing process.
Fig. 5 Setting up for filing: the planished rod is placed in a three-jawed chuck of a Sherline lathe headstock that I have. This could also be done by hand, but spinning the rod in a chuck speeds up the process considerably.
Fig. 6 The spinning chuck. One must also take care that the handle end of the tool (in the case a needle file) is not caught by the spinning chuck and driven back into one's hand.
Fig. 7 The lathe chuck is separate from its lathe bed; I hold the assembly in my lap, turn the motor up to a few hundred rpm, and file and sandpaper the spearhead into shape. This is probably not the safest way to operate the lathe head. Do not try this at home, &c &c.

Fig.8 Running the motor very slowly - sometimes turning the motor off and just rotating the chuck by hand - I score beneath the spear blade to create the border between spearhead and shaft..

Fig. 9 Turning the spear over, I fasten it back in the chuck with the blade facing down. Now I can shape the bronze end-spike of the spear. Called a "sauroter" by the ancient greeks (lit. "lizard sticker").


Fig. 10 The finished spear. This is meant to be a short one - 33mm long overall, which is 1.8m (6 feet) in 28mm scale.

Fig. 11 A closer look.

Fig.12 The spear installed with superglue into the hand of a miniature, in this case a Tom Meier goblin.

Fig.13 Brass rod can be used to make other implements and weapons, with patient shaping and filing - I have made swords, polearms, maces, and axes.