Wednesday, May 9, 2018

Pinning Shields with Brass Rod

Some figures are cast in multiple pieces, and need to be fastened together before painting. Sometimes the connection point is so small that cyanoacrylate (superglue) is not strong enough to fasten the parts by itself. In these cases we need to pin the parts together.
Fig. 1 An Etruscan "2nd Class Citizen Spearman".
Shown is a 28mm Etruscan spearman  by Gorgon Miniatures. The upper-class etruscan warriors could afford to arm themselves like Greek hoplites, while less wealthy Etruscan citizens had to make do with the less-cool-looking local armor and helmets. Compared to the familiar hoplite panoply, native Etruscan armor is strange and interesting-looking - instead of a cuirass, the spearman wears a pair of bronze plate-like circles on his chest and back.
Fig.2 The area of attachment between the shield and the spearman's knuckle is very small. 
The Etruscan shield is a forerunner of the famous roman scutum, and is held by a single handgrip in the center of the shield. On the real life shield, the hole in which the handgrip is placed is covered by a bulbous metal boss. This gives us very little area to make a connection between the parts.
Fortunately, the excellent shields from Gorgon have some thickness, and a substantial boss that we can drill into from the handgrip side. 

Fig. 3 A #67 bit drills out a .032-inch hole; 1/32-inches or about 0.8mm.
I use brass rod for pinning, usually the same 3/64th-inch size that I use for spears and flagpoles (about 1mm), but in this case I am using the next smaller size, 1/32th-inch in diameter.
I use a "pin vice" to hold the #61 numbered drill bit. To drill, just twirl the pin vice by hand, and curlicues of tin "swarf" will begin to emerge.

Fig. 4 The spear that the Etruscan is holding is made of 3/64-inch brass rod - a bit over 1mm. The bit will be a smaller size, 1/32-inch, about 0.8mm. 
I drill matching holes in both the back of the shield boss and in the knuckle of the figure's left hand. Then, I estimate the length of pin needed - in this case, about 3/16th of an inch (about 5mm) - and snip off the brass rod with a pair of snips. The small piece will want to fly across the room...

Fig. 5 Drilling into the poor guy's knuckle with the pin vise.

Fig. 6 Test-fitting the 1/32-inch brass rod in the shield's drill hole. 

Fig. 7 Snipping off about 3/16-inch or so of brass rod for the pin. 
Test fit the pin in each hole, then dab superglue in each hole, place the pin using needlenose pliers, and assemble.

Fig. 8 The pin is glued into its hole in the shield boss. 

Fig. 9 About to glue the pinned shield to the knuckle. 
The cyanoacrylate glue will "fume" as it sets up, and may leave white stains near the gluing point, which will require some paint touch up. I have read that cyanoacrylate fumes are used as one way of collecting a fingerprint.

Fig. 11 Complete!


Fig. 12 The cyanoacrylate glue is still drying. The area around the join will need to be touched up with paint. 
Once the pin sets up, the connection should be strong enough for even careless handling.

Friday, June 9, 2017

American War of Independence Officers

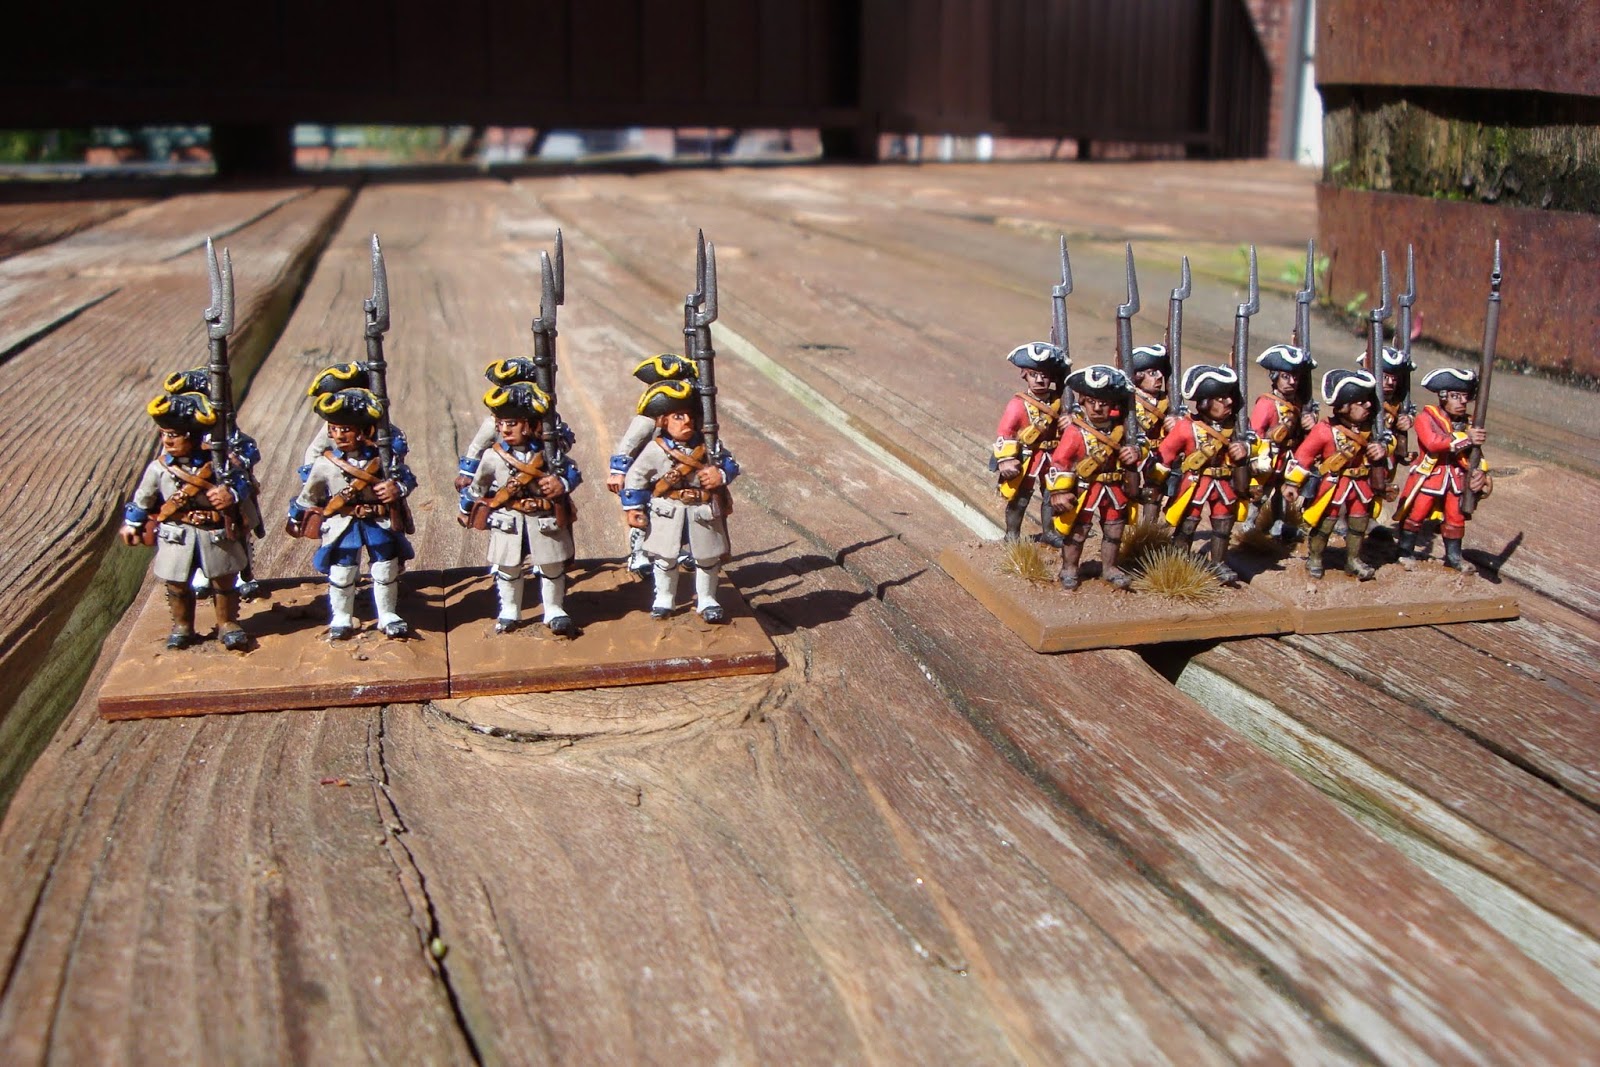
Pictured are three "command" figures from the Perry brothers' American War of Independence (AWI) range of 28mm miniatures:

Fig.1 A trio of Perry AWI figures: two officers and a drummer. 

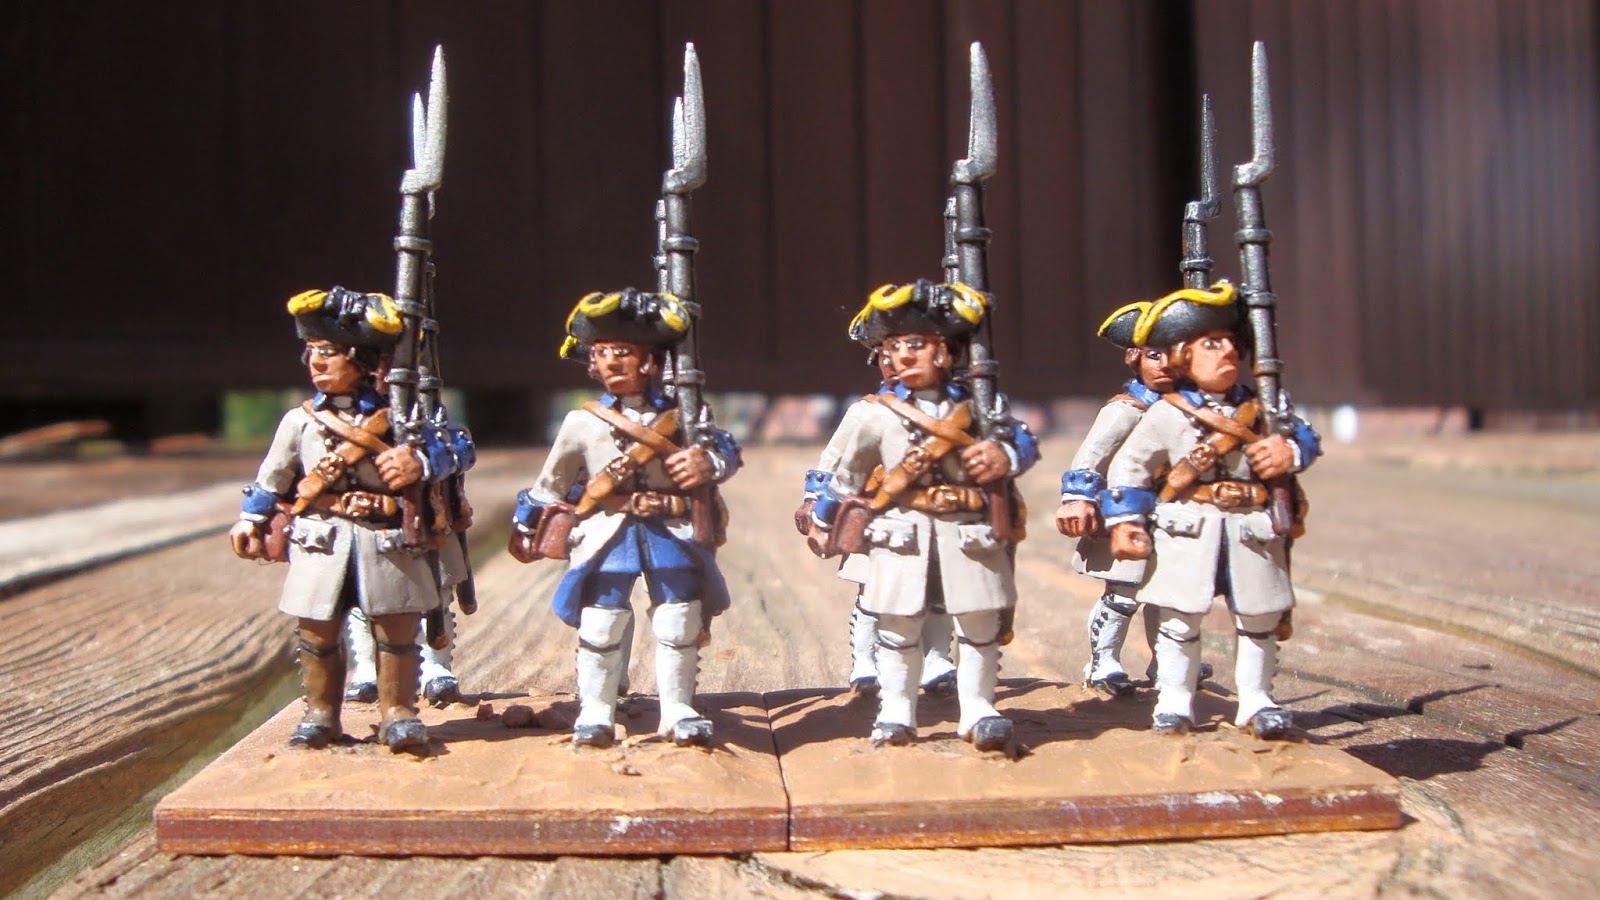
Fig. 2 Very smart-looking late 18th century uniforms. 
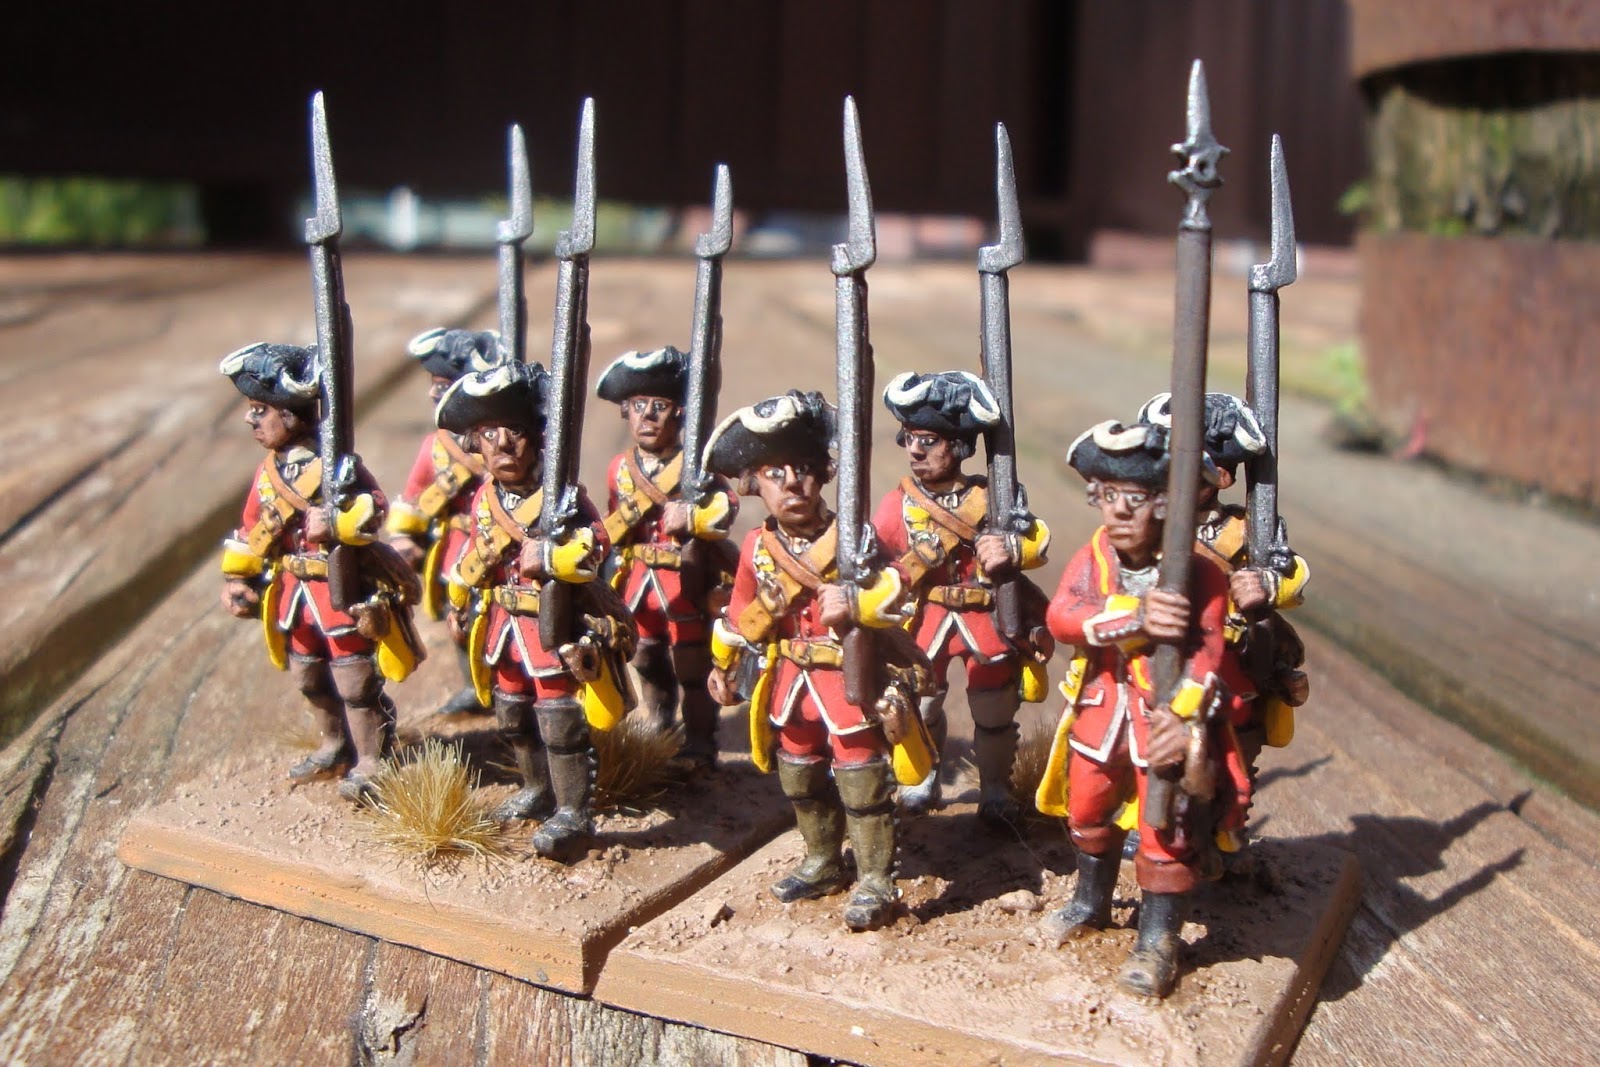
The coats of the 1770s have become closer-fitting than the larger coats of the 1750s, with smaller cuffs. "Small clothes" - waist coat and breeches - are now often white (really a linen off-white), and the long over-the-knee gaiters of the Seven Years War era have shrunk to "half gaiters" that leave the top halves of the stockings exposed. These shorter gaiters are lighter, have fewer buttons to fasten, and probably do just as good a job of keeping stones out of one's shoes.

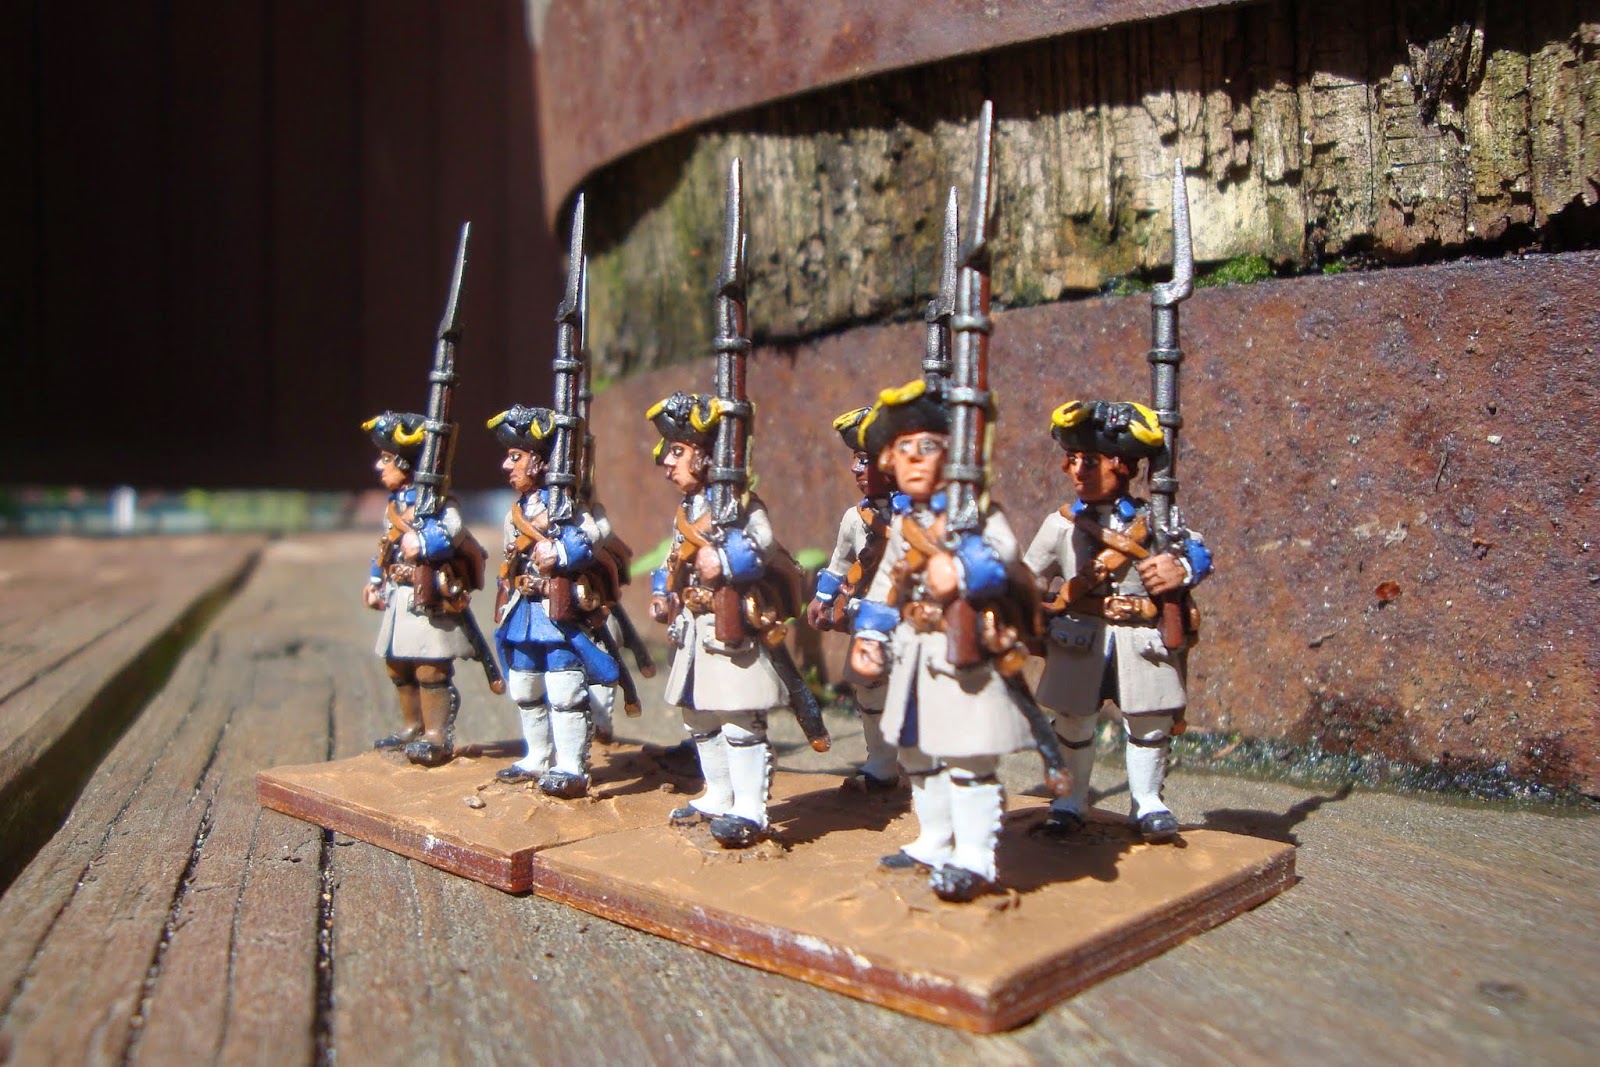
Fig. 3 The drummer wears "reversed colors", red with blue facings.
The drummer in figure 3 wears "reversed colors": a coat of the regiment's red facing color, with facings (collar, cuffs, and lapels) of the regiment's "base" color (dark blue). This would have helped drummers to stand out from the rest of the soldiers, either as an aid to signalling, or merely as a decorative conceit.

Fig. 4 An epaulette on the right shoulder means this is a sergeant or corporal - the silver lace is my mistake. 
The epaulette in figure 4 should either be green (for a corporal) or red (for a sergeant). Only an officer would wear an epaulette of silver bullion, and it would be on the left shoulder.

Fig. 5 A proper Continental lieutenant, with a silver-laced epaulette on his right shoulder. 
I have read that George Washington ordered foot officers in the Continental Army not to carry muskets or fusils, but to carry a spontoon (half-pike) instead. The reasoning was that foot officers should pay attention to directing the actions of their soldiers, and not become distracted by loading and firing a weapon themselves. The lieutenant in figure 5 seems to have ignored this regulation, and equipped himself with a firearm and cartridge box. 

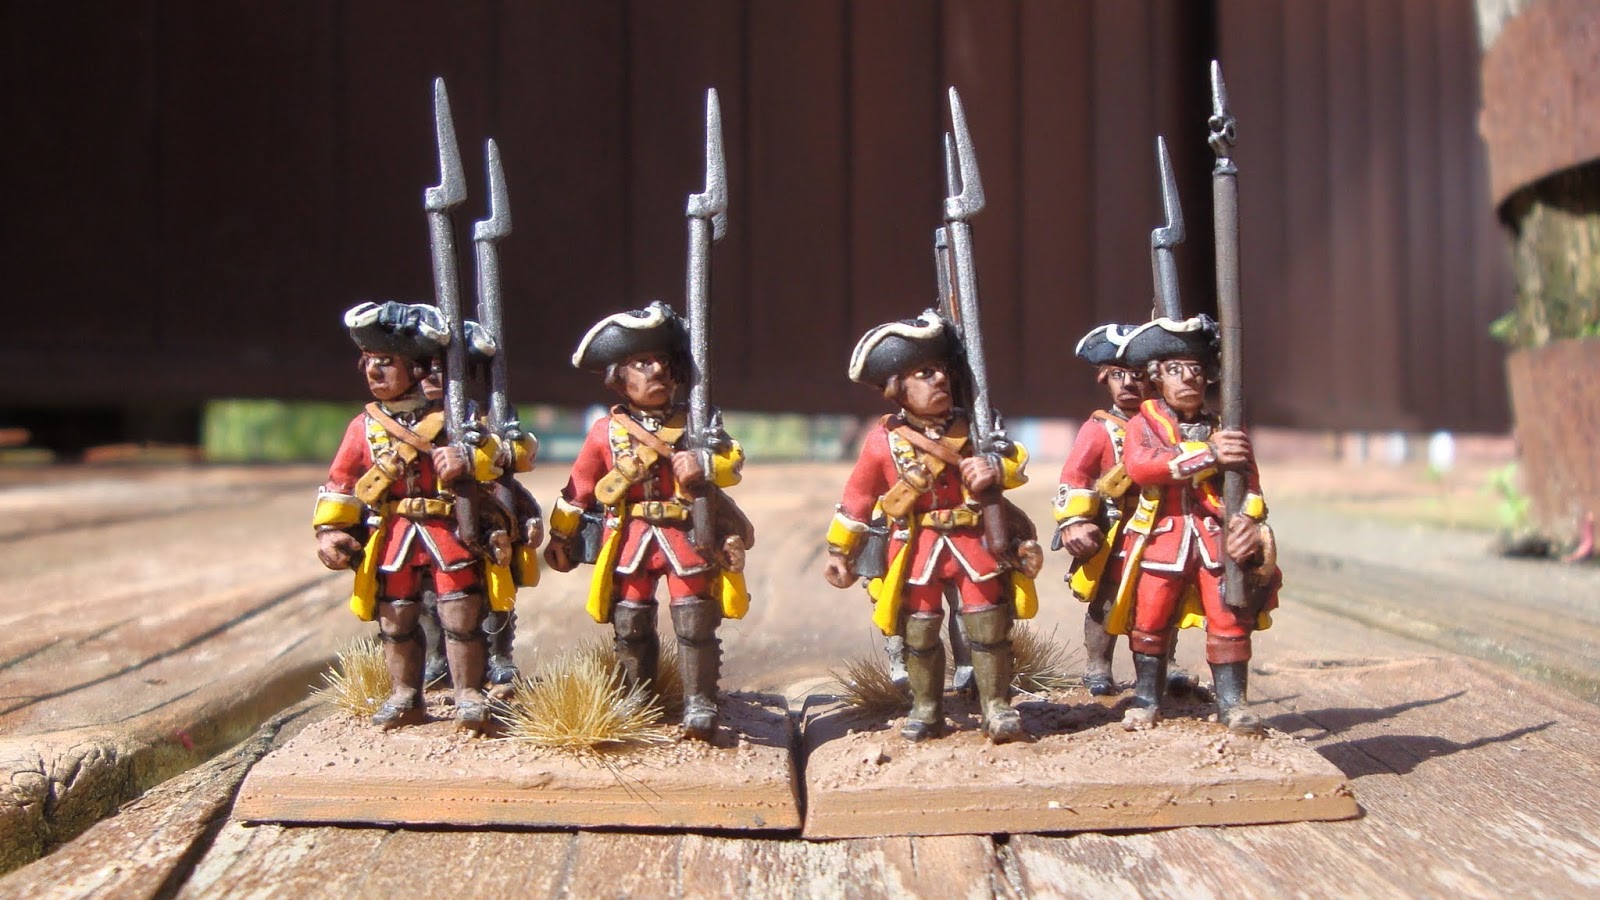
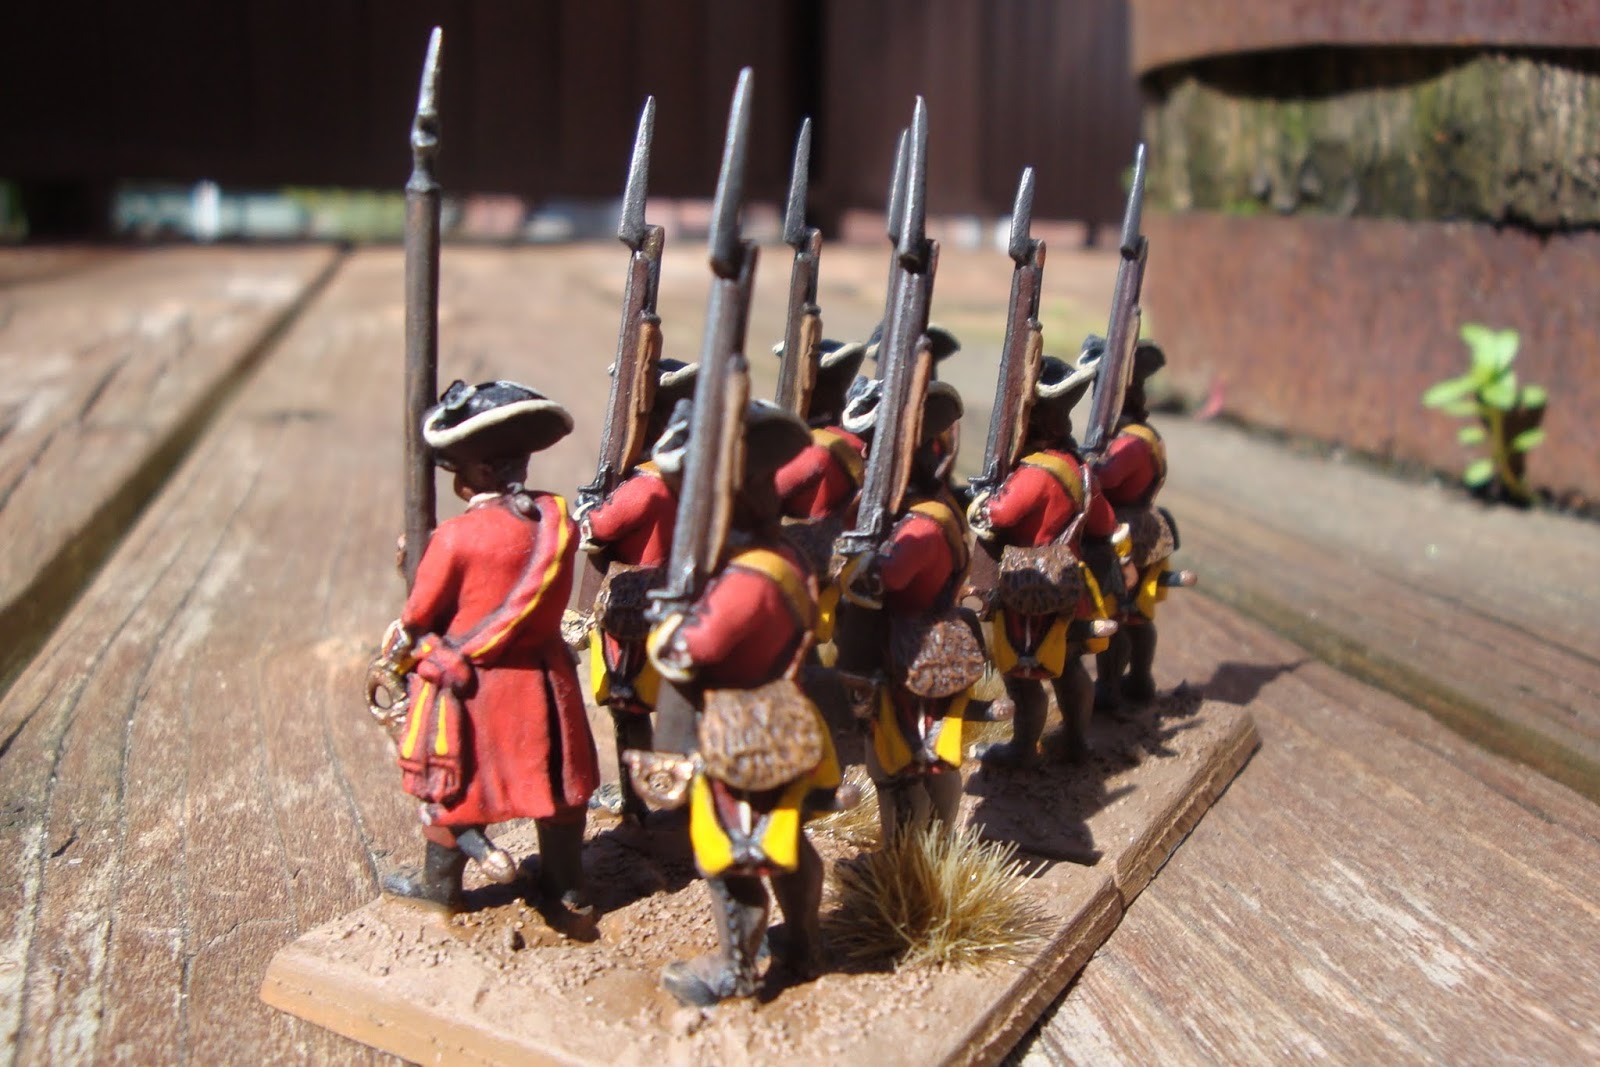
Fig. 6 Where did this cad come from? An officer or sergeant of the loyalist Queen's Rangers.
Lastly, an officer or a sergeant - hard to tell which - of the British loyalist regiment the Queen's Rangers. He wears a short "roundabout"-style jacket in hunter green, which was surely lighter and more comfortable than a full-length coat. As the war progressed, the British adopted more practical uniforms, so that by 1780 or so they don't look much like our conception of the "redcoat" in cocked hat and full gaiters.

Friday, June 2, 2017

Crusader 28mm Apulians

From spring 2014: 28mm Apulian spearmen by Crusader Miniatures, bought from Age of Glory. Shield transfer decals by LBMS.

Apulia is a region in the southeastern "heel" of the Italian peninsula, which experienced Greek colonization and influence as early as the Myceneans.

These figures from Crusader carry Greek-style hoplon shields, colorful tunics that remind me for all the world of soccer jerseys, and what look like lace-up wrestling-style boots.

Fig. 1 Based and primed brown.
At the time I started these I was using 20mm square magnetic bases from GF9, which are no longer made. I don't like how the angled "glacis slope" looks on such small bases, though. 

Fig. 2
Since I did these, I discovered that merely super-gluing the shields to the figures' arms wasn't strong enough to hold them, even when both surfaces were clean and roughed up. Since then I've started pinning the shields to the arms of these figures with short (5mm) lengths of brass rod; to be detailed in a later post.

Fig. 3 The Apulian tunic designs look a lot like soccer jerseys. From the back you can see the Greek-style swords.
These are probably middle- or lower-class members of Apulian society, as they can't afford helmets or body armor. Note that they do wear bronze belts, sort of like a wrestler's championship title belt, the same as the Samnites and other Italian tribes of this era. These belts apparently had some cultural meaning:
Wide bronze belts with several clasps, often in the shape of palmettes, are well known from finds, especially in the regions of Apulia, Lucania, and Daunia, and from representations in Campanian and Lucanian painting. The term Samnite applies to one of the indigenous peoples of Southern Italy whose language was Oscan—thus, for instance, the Oscan warriors on Apulian vases. The belts are connected with warriors and often occur in graves with other military equipment.
I wonder if there is some historical connection between modern championship belts, and these ancient warrior belts.
Fig. 4 The headband only adds to the FIFA impression.

Fig. 5 Shield decal transfers. I can't paint this level of detail freehand. 

Fig. 6 The abstract shield designs are a nice change from the simpler representative images on greek hoplons. 


Wednesday, June 25, 2014

More Seven Years War / FIW British foot

Finished up some 28mm British foot soldiers from Conquest Miniatures last night, and took some pictures this evening before the light failed:

Fig. 1 British Grenadiers and 'hatmen' of the SYW/FIW

Fig. 2 The Conquest figures have a lot of detail and animation, and were fun to paint. Instead of the usual "march attack" pose typical of horse and musket figures, these fellows seem to be marching up a dusty road, sweating under the load of knapsacks, haversacks, muskets, cartridges, canteens, and all manner of baggage.

Fig. 3 The hatmen are more lightly-burdened... did they leave their haversacks in camp?

Fig. 4 On the fronts of the mitre caps are a green GR ("George Rex") of the 40th regiment of foot and the white horse of Hanover. Monogrammed hats... sort of like having a big "Dolce and Gabbana" logo...
Fig. 4 On the fronts of the mitre caps are a green GR ("Georgis Rex") of the 40th regiment of foot and the white horse of Hanover. Monogrammed hats... sort of like having a big "Dolce and Gabbana" logo...

Fig.5 "Present!"
Fig.5 "Present!"

Fig. 6: 3mm plywood bases from Litko, flocking and all paint used from the Toy Soldier.

Fig. 7 Conquest makes two poses, the "road marchers" and the "firers." They can rank up together, but it would look better if the rear rank was standing still, or loading or something.

Fig. 8 Hatmen. The Conquest figures are sculpted in four variations per pose, which give a nice sense of individuality.

Fig. 9 The third from the left looks a bit nervous.

Fig. 10 Almost like Beaker. "What was I thinking? I could get killed here."
Fig. 10 Almost like Beaker. "What was I thinking taking those 40 shillings? I could get killed here."

Fig. 11

Saturday, June 21, 2014

Seven Years War British and French

Below are some mostly-finished British and French stands from the Seven Years War and/or French and Indian War (28mm Crusader miniatures from Age of Glory):
Fig.1 Two partial battalions. Eventually I'd like to finish each unit out to five stands/20 figures.

Fig.2 Serrez les Rangs! 1750s-era French infantry. Meant to represent Compagnies franches de la Marine of New France, with greyish-white coats and natural leather load-bearing equipment. Uniform references from the invaluable Kronoscaf site.

Fig.3 "Shoulder your firelocks!" These muskets weigh about eleven pounds each...

Fig.4 Yellow was one of the most popular facing colors for British regiments, along with buff and green. These look like McDonald's corporate brand standards. These figures could stand in for Amherst's 15th regiment in North America, or several other units in Europe or America.

Fig.5 White was the default color for linen gaiters, but various dark shades - black, brown, grey - were used while on marching on campaign. Common soldiers did not actually wear boots, but rather low-cut black buckled shoes.

Fig.6 The person on the left is a sergeant wearing a sash and carrying a spontoon or "half-pike", a vestigial pole-arm weapon which could be used to level the barrels of his soldier's muskets, or, as below, to prevent them from scurrying to safety. The soldier closest carries a hair-covered knapsack, somewhat like a modern bike messenger bag.

Fig.6a Detail from a painting of the battle of Fontenoy in 1745, showing a sergeant using his spontoon to press against the backs of his anxious soldiers.


Fig.7 The Crusader miniature sculpts have a nice, chunky, "toy soldier" feel to them, an are relatively easy to paint.

Fig.8 "Portez vos armes!"

Fig.9 Units stationed in North America soon learned to discard their "hanger" swords for tomahawks. These guys still have theirs.

Fig.10 These bases still need to be flocked with vegetation.

Saturday, May 24, 2014

Gorgon Etruscan Hoplites Part 1

I have been painting a series of Gorgon Studios Etruscans figures. These are meant to represent the Etruscan league's army of about 500BC, in the time of Lars Porsena and early Rome. Most of the army would be equipped in the local Italian style of armor, but the wealthiest Etruscans would purchase costly Greek-style equipment - sort of like buying an expensive foreign car?

These hoplite figures, however, could also stand in for any Greek-pattern infantry of this period - Italiots, Siciliots, etc. 
Fig. 1 Hoplite with Corinthian helmet and spolas armor.
Shield design is a transfer from Little Big Man Studios (click to enlarge).
I remember first reading about "linothorax" armor in the late Peter Connolley's Greece and Rome at War. A linothorax is supposed to be a sort of flak jacket composed of many layers of linen cloth glued together into a stiff corslet. The corslet could be left plain, or else additional armor, such as bronze scales, could be sewn to the midsection. There are certainly Greek vase paintings showing soldiers donning armor made of some stiff material, such that the shoulder pieces stuck straight up until they were tied down:
Fig. 2 Kind of like cardboard.

There is now a controversy about this theory - a few yards of linen cloth and some Elmer's glue is inexpensive to us in the machine age, but not 2500 years ago. Why bother growing acres of flax, weaving linen cloth, and gluing up layers of the cloth with water-soluble animal glue, when one could use thick leather instead? The "linothorax" may have actually been made of stiff leather that would not delaminate the first time you got caught out in the rain. Who knows.

Fig. 3 Some helmet crest holders had a zig-zag pattern at the base of the horsehair crest, which is much easier to paint than the checkerboard pattern that was also used.
The fibers of the horse hair crest are bound into a "crest box". The crest box may have simply been glued to the top of the bronze helmet with pine tar.

Although many people imagine Greek-style spear men displaying the uniform "lambda" shield designs of late Spartans, most Greek shield designs were a riot of heraldic variety. Even the Spartans did not use the "everyone shows a lambda" shtick at the time of Thermopylae. Sorry Frank Miller.

Fig. 4 A very simple hand-painted dolphin.

Fig. 5 Simple painted bird and shield rim pattern.

Fig. 6 Beginnings of a phalanx.


Fig. 7 I'm happy with how dolphin guy's tunic stripes came out.